
Imagine it’s Tuesday morning and you open a computer. You see the same problem: a patient bill mailed six weeks ago is still outstanding. No money has been received, no response has come. While your clinic desperately needs $12,000 to pay the staff.
This is not a personal problem. This is the dilemma that all physicians face. Now, by comparison, consider that you sent 217 bills via computer last month and got paid in an average of just 9 days. Not a single bill has been delayed.
The reason is EDI Enrollment in medical billing. It is a digital system that creates a fast path between the clinic and the insurance company, enabling the entire process to be completed automatically and instantly.
What is EDI Enrollment in Medical Billing?
What is EDI?
EDI (Electronic Data Interchange) is a secure, standardized digital language through which hospitals or clinics contact the insurance companies. It eliminates the need for old-fashioned faxes, mailing envelopes, and manual data entry work and turns it into computer files.
What is EDI Enrollment?
It is not enough to just have a computer; you also have to register with the insurance company. This is called EDI Enrollment. Think of it as a digital ID for your clinic that is required to enter the insurance network.
In this process, the insurance company checks your documents (such as NPI, tax ID, and clinic address) to allow them to send and receive data from you.
What Does This Mean for You?
Once you are registered (Enrollment), you can do the following without using paper:
- Send your bill to the insurance company immediately.
- The computer will know how much money was received and how much was deducted.
- Check whether the patient’s insurance is active or not.
- Track your bill status to see where it stands.
The registration is done separately with each insurance company. If you are registered with Blue Cross, it does not mean that it will be done automatically with Medicare or other companies. Each company has its own form and its own procedure.
Elements of EDI Enrollment
There are some important things required to complete the EDI Enrollment in medical billing. In simple terms, these are the 6 pillars on which your entire digital billing system stands:

Trading Partner Agreement (TPA)
This is a legal agreement between your clinic and the insurance company. Without it, you cannot send digital data to each other. It is a kind of legal permission to start work.
Submitter ID
This is a special identification number that the insurance company gives you. Whenever you send a bill from the computer, this ID tells the insurance company that this file came from your clinic.
NPI and Tax ID
NPI number (individual and corporate) and Tax ID must be absolutely correct. If there is even the slightest difference between these numbers in the insurance company’s records and your application, your registration will be rejected immediately. This is the most common mistake.
Taxonomy Codes
These codes tell what your specialty is and the treatment you provide. If these codes are incorrect, it takes a while for the insurance company to figure out which department to send your bill to, which delays the payment.
Clearinghouse
Most clinics do not send bills directly to the insurance company, but use an intermediary service called a Clearinghouse. You need to tell your insurance company which clearinghouse (such as Availity or Change Healthcare) you are using.
Electronic Payments (ERA and EFT)
Just sending bills digitally is not enough. If you want your insurance money to come directly to your bank account and the details are on your computer, you also need to register for EFT (Early Payment Transfer) and ERA (Digital Receipt). If you don’t do this, the bill will go through the computer, but the money will come in the same old way as a paper check.
Types of EDI Transactions
When you complete EDI Enrollment in medical billing, you not only have to send bills, but also get access to the entire insurance system. In this system, there is a special number (code) for each task.
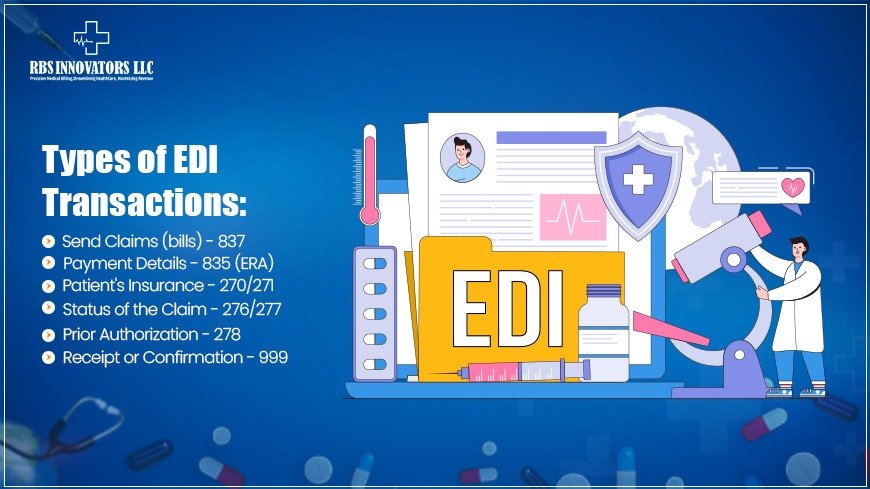
Send Claims (bills) – 837
It includes the claim submission to the insurer for reimbursement.
| 837P | For the doctor’s clinic bills. |
| 837I | For hospital bills |
| 837D | For dental bills. |
Get Payment Details – 835 (ERA)
When the insurance company makes a payment, it sends you a digital receipt called an ERA. This lets you know how much money was received, why it was deducted, or why the claim was rejected.
Checking a Patient’s Insurance – 270/271
It involves checking the computer to see whether the patient’s insurance is active before they arrive at the clinic.
Knowing the Status of the Claim – 276/277
It allows your billing team to check the status of your bill without making a phone call.
Obtaining Prior Authorization – 278
There are some treatments for which permission is obtained from the insurance first. Through this system, you can obtain that permission (Prior Authorization) immediately on a computer rather than by fax.
Receipt or Confirmation – 999 or TA1
Whenever you send a file, the system immediately gives you a digital receipt to let you know whether your file was received by the insurance company or if there are any errors. This lets you know right away whether the job was done correctly or not.
EDI Enrollment Requirements for Insurance Payers
Before initiating electronic billing, insurance companies verify who you are and whether you have the legal right to send the bill. Although each company’s forms may vary, some EDI enrollment requirements for insurance are required everywhere. Here is the EDI payer enrollment process explained:
Checklist of Required Documents
NPI Number
Your National Identification Number (Type 1 for individuals and Type 2 for clinics/groups).
Tax ID (EIN)
Your federal tax number that matches your government documents (W-9).
Clinic Details
The clinic’s legal name, address, and contact information for the person responsible for billing.
PTAN or Provider ID
The PTAN number or unique ID assigned by the company for Medicare.
Signed Agreement
A legal agreement to work with the insurance company, signed by the head of the clinic.
Different companies have different rules
Each insurance company has its own procedure:
Public insurance
For example, Medicare requires registration on the PECOS portal, while Medicaid rules may vary across states.
Private companies
For example, Aetna or Cigna often registers through their own portals (such as Availity).
Direct or clearinghouse
Always check whether the company will accept registration through your clearinghouse or if you need to link directly with them.
Technical and legal requirements
Security regulations (HIPAA)
The internet path for sending data must be secure so that patient information is not stolen.
Business Agreement (BAA)
If you are using a clearinghouse, they must have a legal agreement (BAA) with them that guarantees data security.
Technical codes
Some companies may also ask you for a transmitter ID or testing details to check if your computer is properly connected to their system.
Steps for EDI Enrollment for Healthcare Providers
Here are the simple steps to complete the EDI Enrollment in Medical Billing. By understanding this, you can move your clinic from paper to digital:
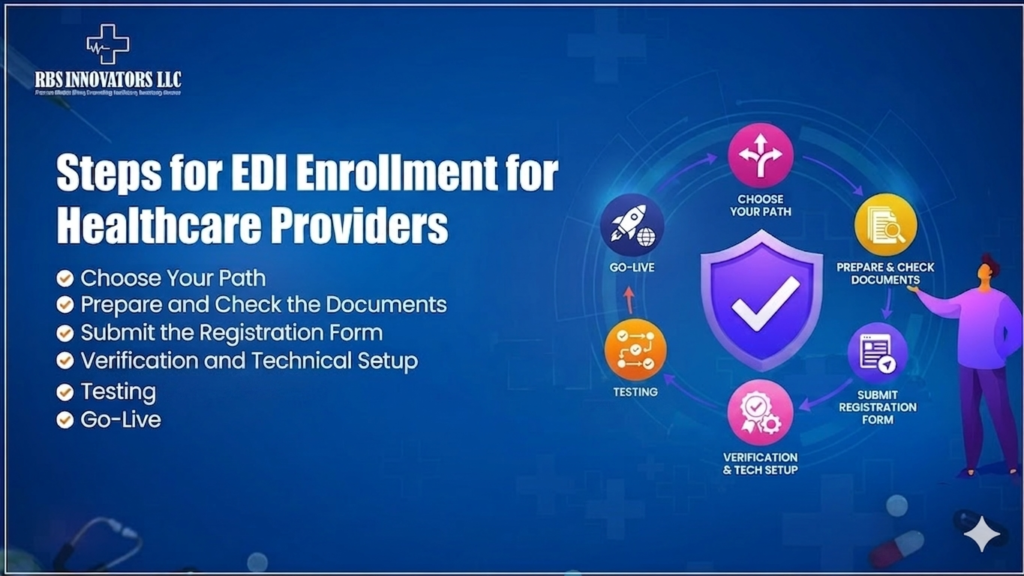
Choose Your Path
First, decide whether you will register directly with each insurance company or need the help of a Clearinghouse (like Availity or Waystar). A clearinghouse is ideal for small and medium-sized clinics because it connects you with multiple companies from one place.
Prepare and Check the Documents
Collect your NPI number, Tax ID, and clinic details. One important thing: be sure to check that your name and tax number match exactly with the government records (NPPES). If there is even the slightest difference, your application will be rejected immediately.
Submit the Registration Form
Fill out each insurance company’s form. Some companies take the form through a portal, some by fax, and some by mail. Remember that the billing (837) and payment (835) forms are often separate, so complete both.
Verification and Technical Setup
The insurance company will review your data. Once approved, they will give you specific IDs and codes. Your IT team or clearinghouse will enter these codes into your computer system (Practice Management System) to establish the connection.
Testing (Required Step)
Before you start live work, check that the system is working properly by sending some test claims. Check that the receipts and payment details are being received correctly. If there are any errors, fix them right away.
Go-Live
After testing is successful, start sending real bills. Keep a close eye on the work for the first 30 to 60 days: see how many claims are being accepted and whether the money is coming in on time. Assign a single employee the responsibility of overseeing this entire digital system.
Benefits of EDI Enrollment in Medical Billing
EDI enrollment in medical billing is not just a computer job, but a big step towards strengthening your clinic financially. When your clinic shifts toward electronic data interchange healthcare, these are the 5 major benefits:
Quicker Refund
Paper bills take months to pay, but digital bills (837) result in days. Money that was supposed to be received after 30 days is now received even before 10 days. This makes it easier to run the clinic’s daily expenses.
Reduction in Errors and Claim Rejection
The digital system checks the bill before sending it. If any code is misspelled or there is any deficiency in the patient’s information, the system immediately informs. In this way, the risk of bill rejection is reduced by 50%.
Automation
When the insurance company sends the money, its details (ERA) are automatically entered into your computer system. Staff no longer have to manually enter each receipt, which can save time and eliminate errors.
Everything in View
You can check in a second before a patient comes in to see if their insurance is active. Similarly, there is no need to call the insurance company to ask about the bill because you can track it right on your computer.
Cost Reduction and Legal Savings
Digital billing is fully compliant with new insurance laws, which saves you from legal complications. In addition, paper, printing, and postage costs are eliminated, saving you approximately $3-$8 per bill.
Frequently Asked Questions(FAQs)
Q1: How long does EDI enrollment take?
Ans. It usually takes 2 to 8 weeks. It depends on how fast the insurance company’s system is and how accurate the information you provide is.
Q2: How to complete EDI enrollment in medical billing?
Ans. First, verify your NPI and tax ID, then choose a clearinghouse, fill out and submit the insurance company forms, and send some test transactions to check before you start working.
Q3: What are the four major parts of EDI?
Ans. Four major parts are:
- A special data format (X12).
- A secure way to send data (SFTP or AS2).
- Legal agreement with the companies (Trading Partner Agreements).
- Software that transmits data efficiently.
Q4: Can I use the same registration for different clinic locations?
Ans. No, a separate registration is required for each location with a different Tax ID or address, even if they are part of the same organization.
Conclusion
EDI Enrollment in medical billing is not just a technical requirement; it is the foundation of your clinic’s success. Completing this process connects your clinic to an automated system, where bills are collected instantly, patient insurance is checked on the spot, and the amount is deposited into bank accounts quickly. This not only reduces errors but also reduces the burden on staff.
The initial registration process indeed requires a little effort and attention, but the time and money saved will pay off for years to come.